Clay photo holder with instax mini Link 3™
Materials needed
- Airdry clay
- Knife
- Sponge
- Cardstock paper
- Brushes
- Acrylic paint
- Varnish
- instax mini Link 3™
- instax™ mini film
Step 1
Roll the air-drying clay into a thick piece about 2 centimetres thick. Tip: If you place a small strip about 2 cm high on both sides, you’ll end up with a nice, even piece.
Step 2
Cut a 5 x 2.5 cm rectangle from the piece of clay. Tip: Make a small paper template to help you cut straight lines.
Step 3
Smooth the sides of the block with a damp sponge.
Step 4
Use a piece of cardboard to press a groove into the clay. Leave the clay to dry for at least 2 days. Leave the piece of cardboard in the clay whilst it dries.
Step 5
In the meantime, you can make matching name tags out of paper.
Step 6
Once the photo holders are fully cured, lightly sand them and wipe off any dust with a damp cloth.
Step 7
Paint the holders with acrylic paint.
Step 8
Seal the holders with a (glossy) varnish. This gives them a beautiful finish and makes them last longer.
Step 9
Print your favourite photo with the instax mini Link 3™ and stick the name tag onto the photo.
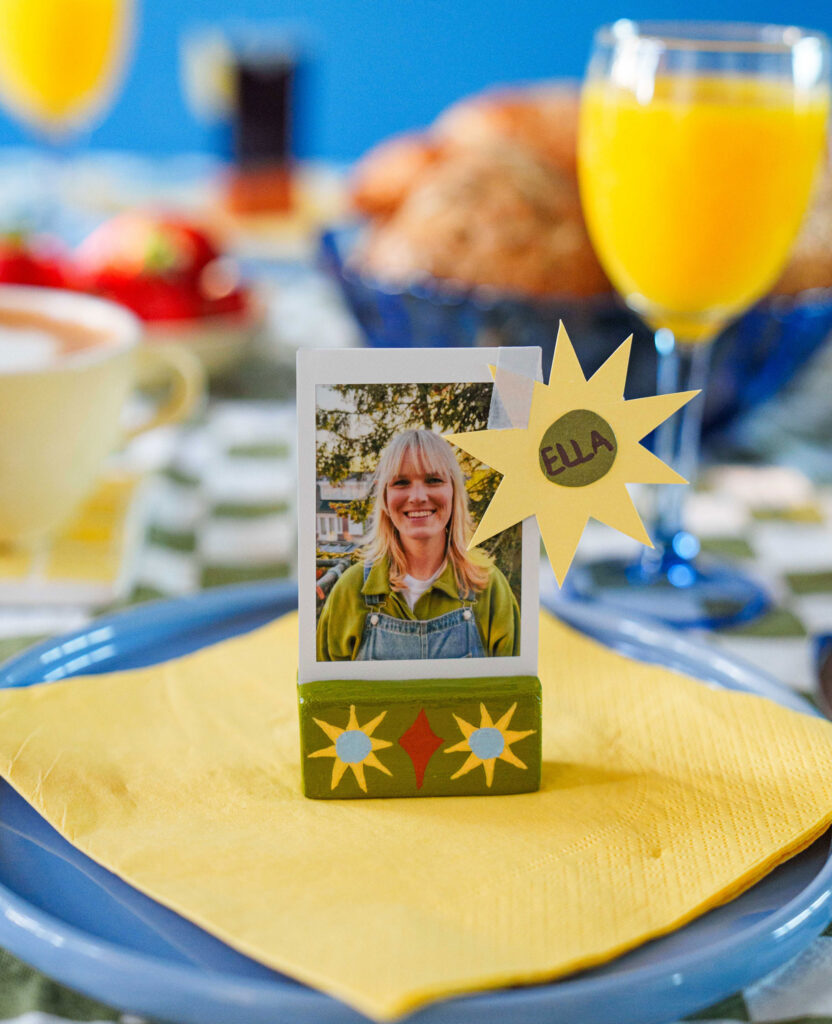
Your photo holder is finished, ready for the brunch table! 🥐🍊☕
DIY by Ella Meesters